
Professional real estate photography for your listings is usually imperative to maximize the listing value. But what if the listing needs a little prep work before the photo shoot?
Some properties are staged, some homeowners are meticulous and keep an immaculate setting throughout the house. If only we could be so lucky to have all listings in this manner.
For the properties in need of a little extra attention, here are 5 simple steps to improve the appeal of your property, specifically for professional real estate photos.
Step 1.
Stow away as many personal belongings of the homeowners as possible. This includes everything from phone chargers, to notes on the fridge, and tooth brushes in the bathrooms. Here is a quick list of personal items that should be tucked away. Extra tip: just simply put the items in the closest drawer or cabinet, so that they are easy to re-locate for the homeowner after the photo shoot.
- Visible shoes, slippers, or “on the go” clothing that may collect near the front door.
- Magazines, paperback books, iPads, reading glasses, and small items that reside on nightstands and end tables.
- Phone chargers or electronic chargers of any type.
- Television remote controllers and video game controllers.
- Tooth brushes/tooth paste, toiletry items, medication, makeup, anything occupying bathroom counters that isn’t decorative.
- Children’s toys and anything relating to a pet (dog beg, chew toy, cat stand).
- Exercise equipment outside of a designated exercise room (yoga mats, medicine ball, small weights, resistance bands).
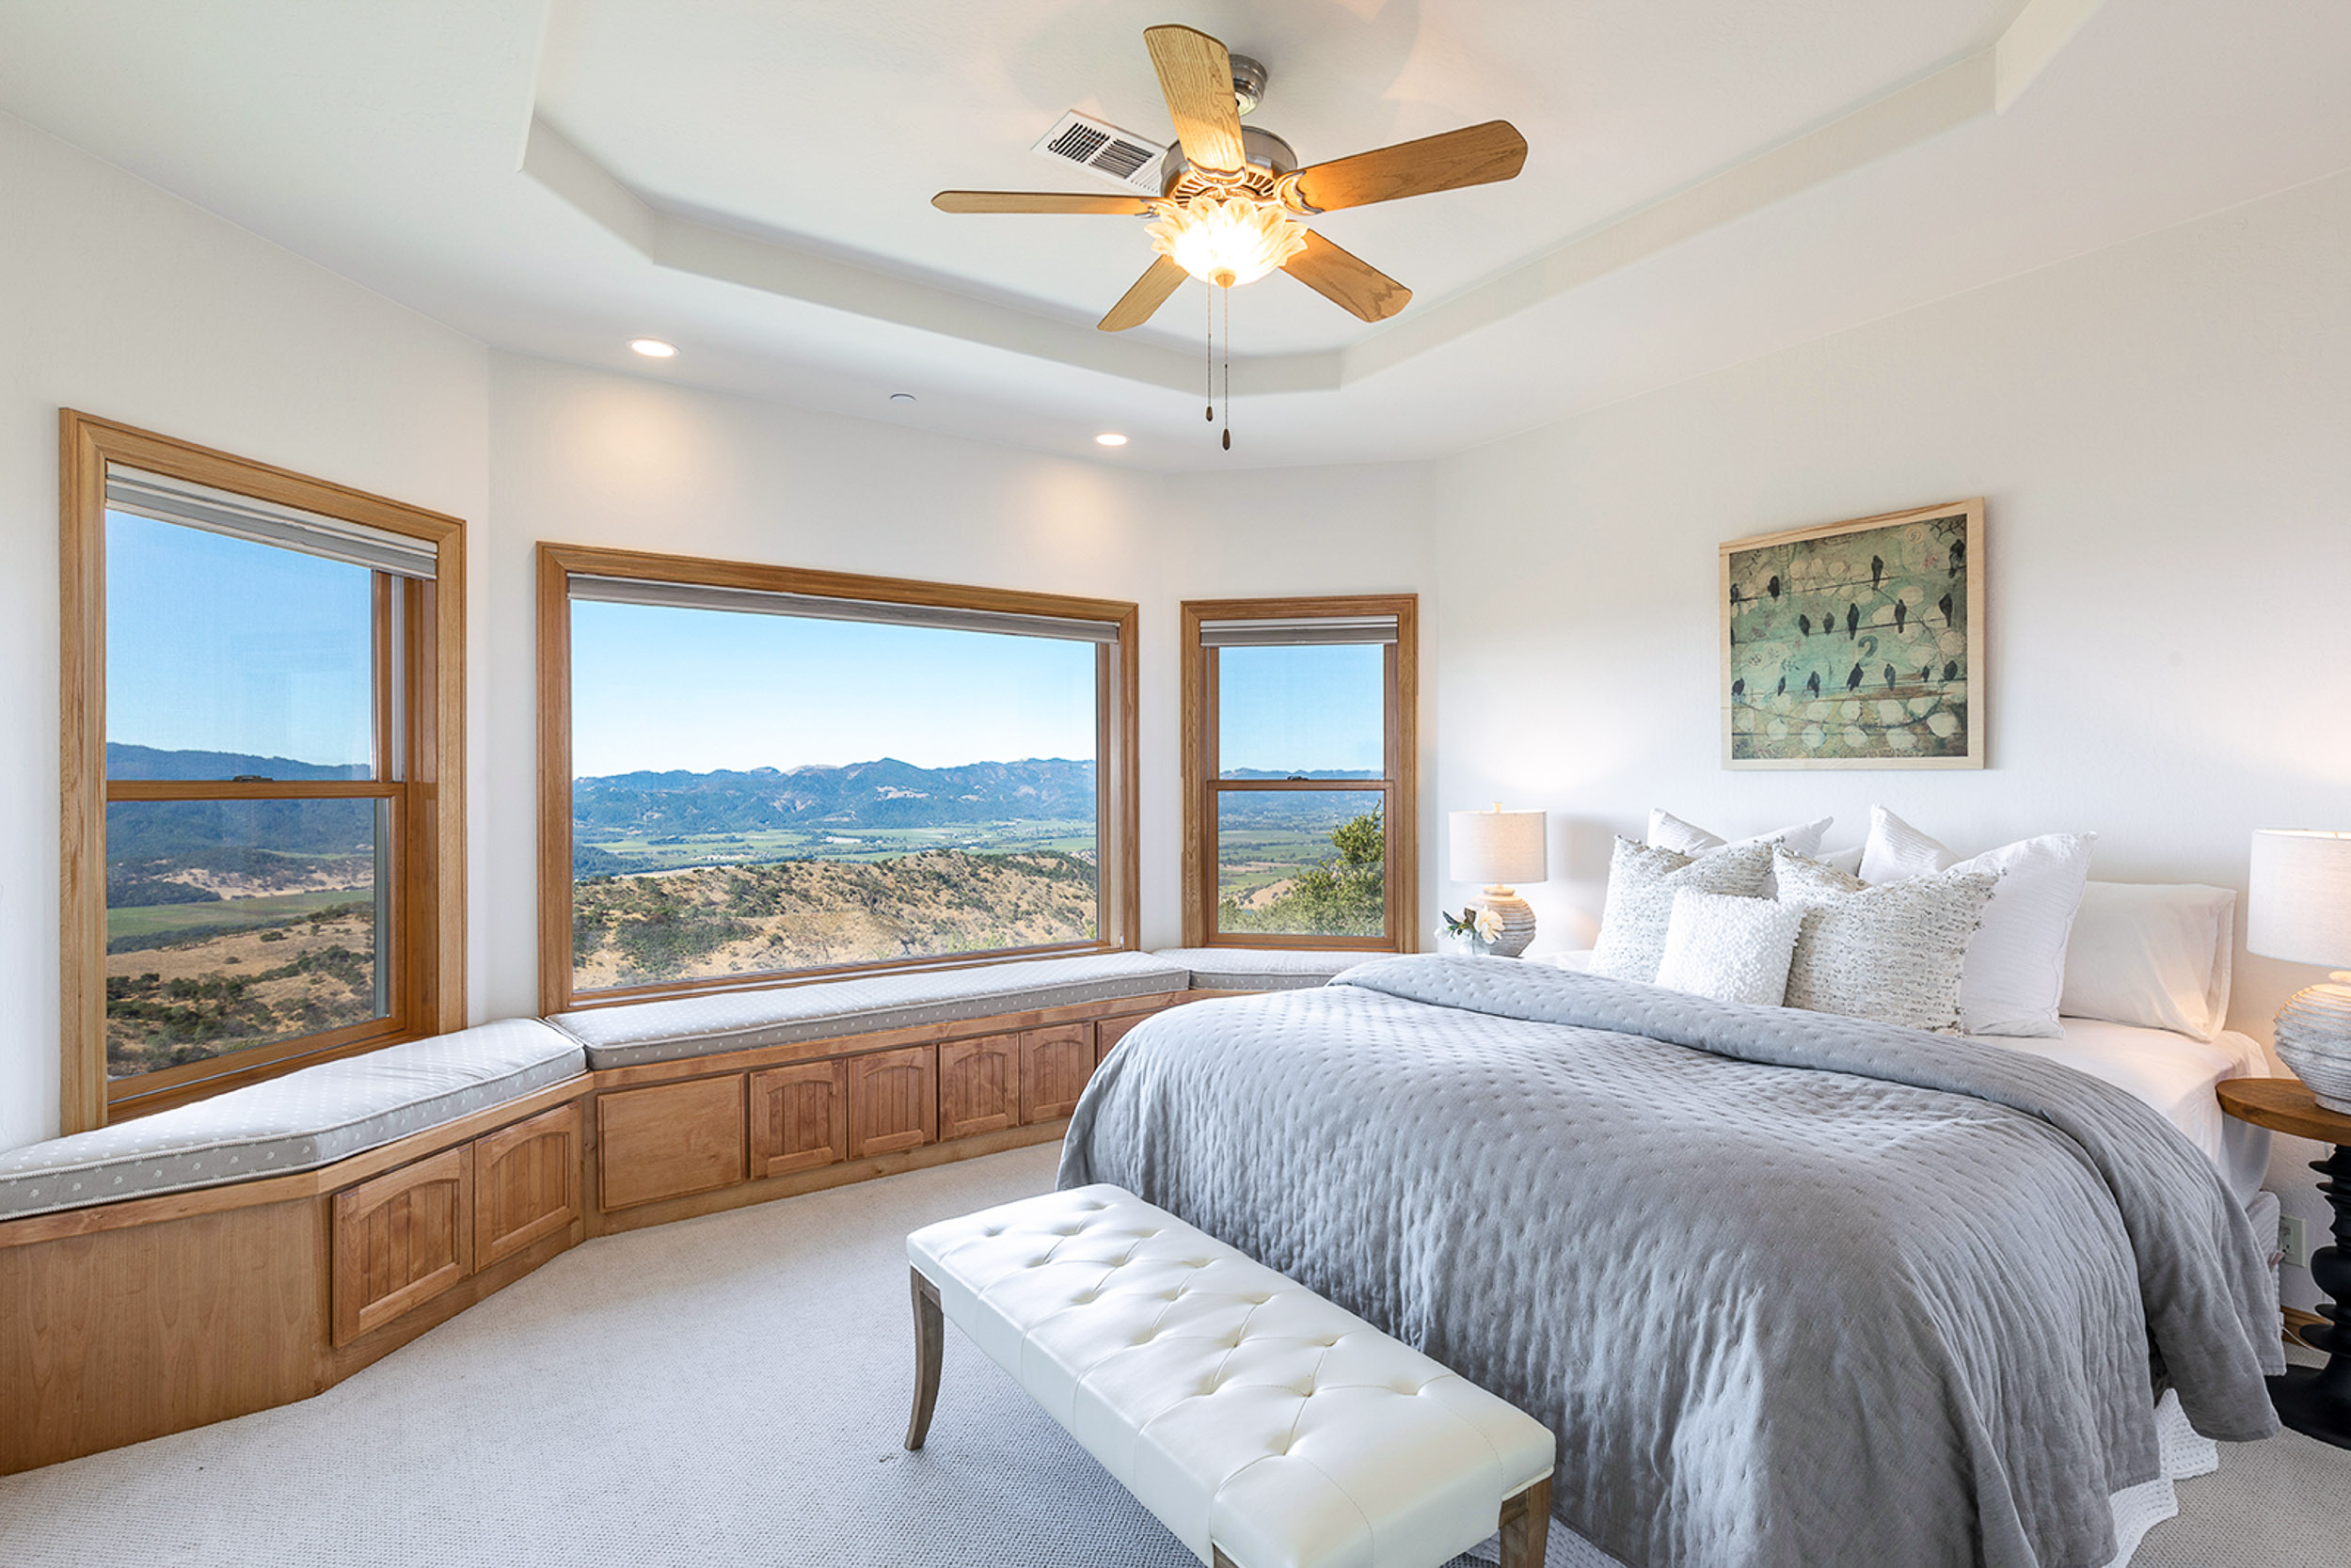
Notice how tidy this room is. It’s not staged, just clean and orderly. Bed is made, no items thrown about, and nothing obstructing the awesome view.
Step 2.
Conduct a general cleaning and tidying of the property. Schedule a cleaning service or roll up the sleeves and at least brush over the interior of the house. Tidy up counter tops, clean any windows that might have a nice view, dust furniture, the basics. Insure beds are nicely made, laundry is out of sight, floors are free of debris. A fresh house will show up nicely in photos. Quick tip: once the cleaning is done, if the listing has hard wood floors, be sure to wear socks or shoe covers afterwards to keep the floors spotless until after the photo shoot is complete!
Step 3.
This one is easy, put the garbage, recycling, and yard waste cans in the garage or out of sight. Out of sight can be in a fenced-off side yard or even a few feet from the curb just for the exterior photos. Do this for inside the house too, put all kitchen garbage cans, and bathroom garbage bins in a closet or the garage until the photo shoot is complete.
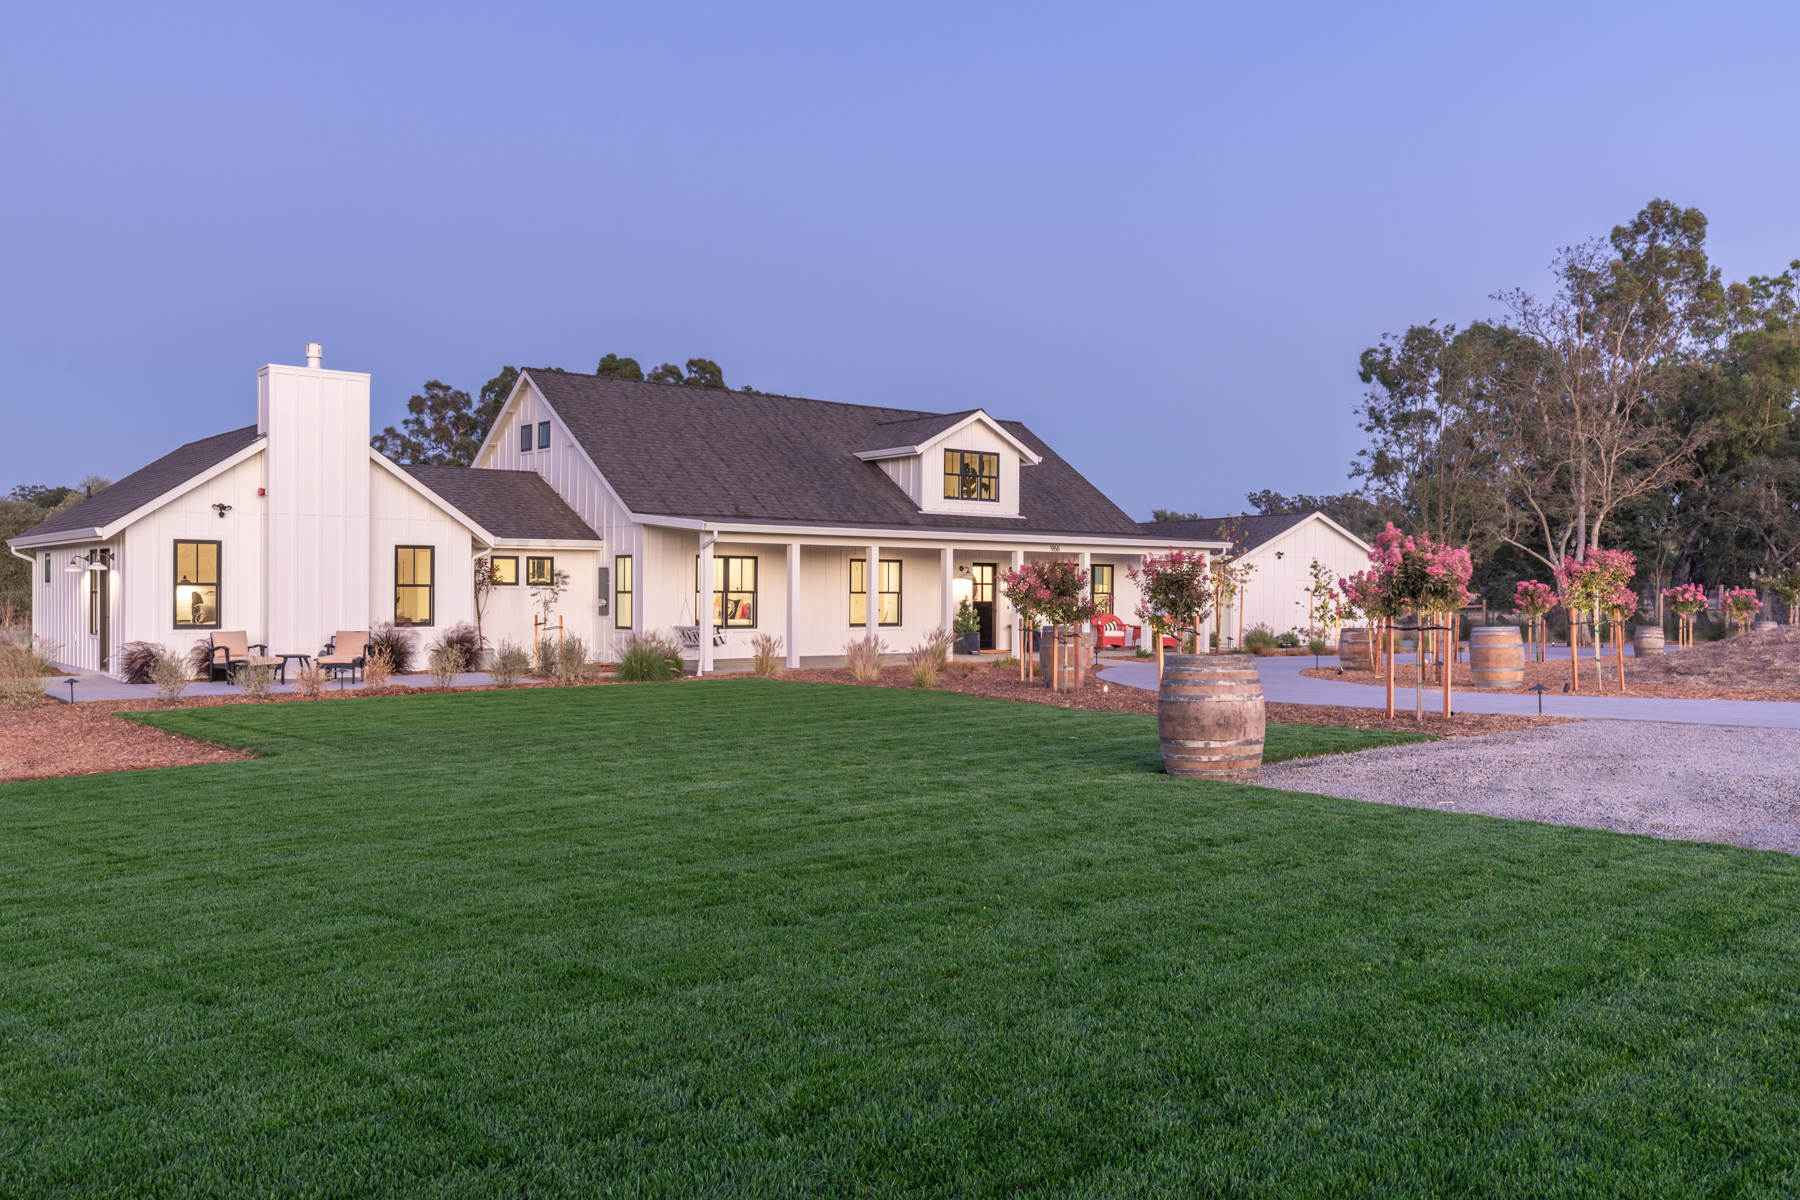
No garbage cans or yard work tools in sight. Just a clean and orderly yard, ready to present.
Step 4.
Tidy up the kitchen and store away as much as possible. Kitchens tend to collect the most items. We keep our olive oil bottles, commonly used spices, and miscellaneous cooking items usually within arms reach. Cereal boxes make their way to the top of the fridge, a pack of sliced bread might live on a counter top or cutting board. This part of the property usually has the most appliances as well. I typically recommend hiding as much as possible in the kitchen, leaving only a few clean and aesthetic appliances (kitchen-aid mixer, espresso machine, high quality toaster, etc) to occupy some counter tops so that the room doesn’t feel too sparse, but nice and tidy. A bowl of colorful fruit/veggies is always nice to have out as well, but not mandatory.
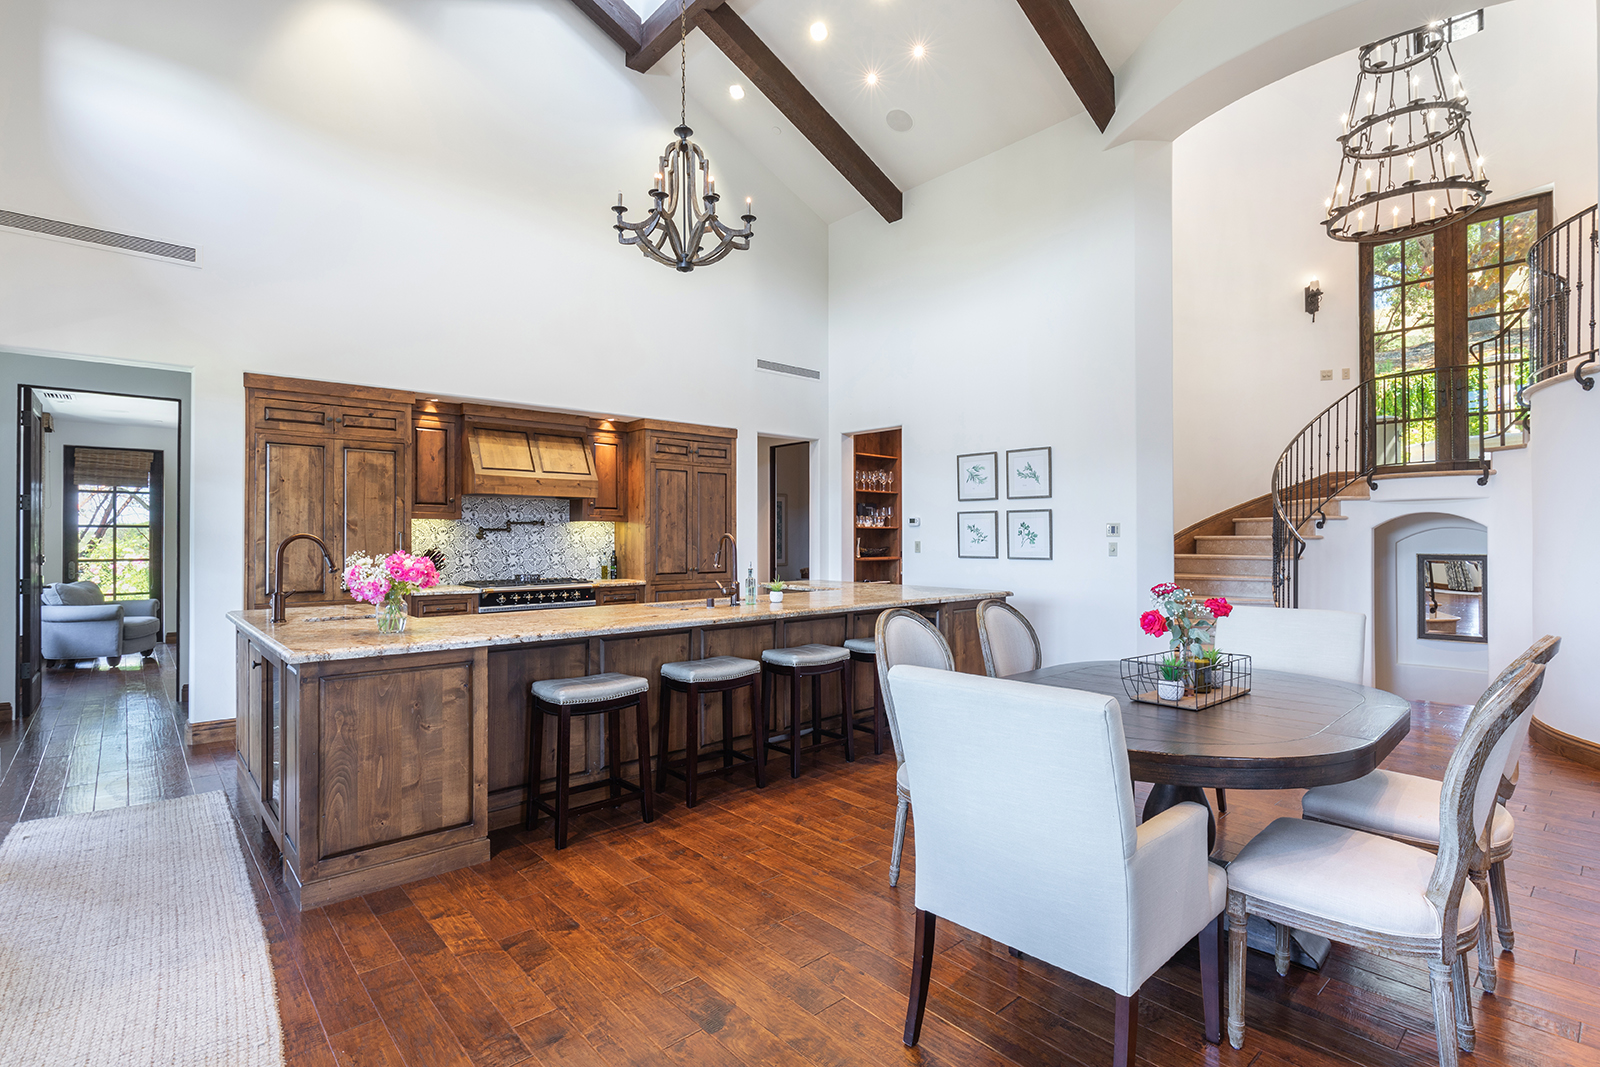
A tidy kitchen is welcoming. Enough room to allow the viewers to consider how they would utilize the space is key, without making it too sparse in the photos.
Tip 5.
The garage is your hub for all things tidying. Unless the garage has been converted to a rec room or something similar, odds are it’s already pretty well occupied with random stuff and doesn’t need to be photographed. Use this space to temporarily store anything and everything that needs to be removed for real estate listing photos.
If the garage has been turned in to a rec room or beckons to be photographed (it’s pristine in condition and well cleaned), then use closet space, attic space, cabinets, or even designate one bedroom that doesn’t need to be photographed if absolutely needed.

A few final quick tips:
Less is more. Create a “blank slate” feel to the house without letting it become too empty. You want potential buyers to feel welcomed and at home by looking at the photos but also providing enough space and room for buyers to envision what they might do with the space.
When you book a photo shoot, do not overlap that time with other vendors (pest inspection, locksmith, landscapers, cleaners) or an open house. This creates a lot of extra work and delays for the photographer, the other vendor, and yourself.
It’s often best to re-locate pets during the photo shoot. Simply putting them in the backyard means they’ll probably stalk the sliding glass doors or any window they can to see what’s going on the house. In other words, animals want to be in the photos 🙂
If you’re interested in booking a professional real estate photo shoot for Sonoma County, Napa Valley, or Marin County, feel free to reach out to my directly. I photograph around 300+ properties a year with almost a decade of experience.
DarrenLoveland@gmail.com or (707) 363 – 2489.
Cheers!
-Darren